Did you know that the average homeowner tackles 3 DIY painting projects per year, with staircases often being the most dreaded? If the thought of endless taping and aching wrists makes you hesitate, you're not alone. For years, I've found myself painting more stairs than I ever thought possible, from weathered exteriors to interior transformations. It's often the quickest way to breathe new life into a tired home. When we moved into our current house, the stairs were buried under a truly ghastly shade of green carpet. We ripped it out immediately, planning a quick paint job as a temporary fix. But, surprisingly, we grew to love the painted look and left it as is for years.
The Worn State of Stairs and a New Approach
Over time, that paint job started showing its age. It was time for a refresh, and we decided to mix things up: a lighter color on the risers for a touch of modern contrast. This project gave me the perfect opportunity to deploy one of my favorite painting hacks: a wall edging pad on stair risers. I can't quite recall who first showed me this trick, but it dramatically speeds up the entire process. Previously, tackling stairs meant a significant amount of painter's tape and a sore wrist from constant use of a cutting brush. While I've become quite adept with a cutting brush and often skip taping, stairs, with their myriad angles and edges, still present a unique challenge. Using a dedicated wall edging pad eliminates the need for tape and drastically reduces wrist strain.
Consider this: painting a wall edge with a standard brush requires constant precision. Now, imagine doing that across dozens of stair risers. It's a recipe for fatigue. But i used this wall edger, and it's a game-changer. It's designed for those precise edges, making it ideal for the vertical surfaces of stair risers. I've even used a similar pad technique when painting around intricate trim work in a hallway, achieving a crisp line where tape would have been a nightmare to apply correctly.
Gathering Your Painting Arsenal
Before diving in, ensuring you have the right tools is key. Here's what I gathered for this project:
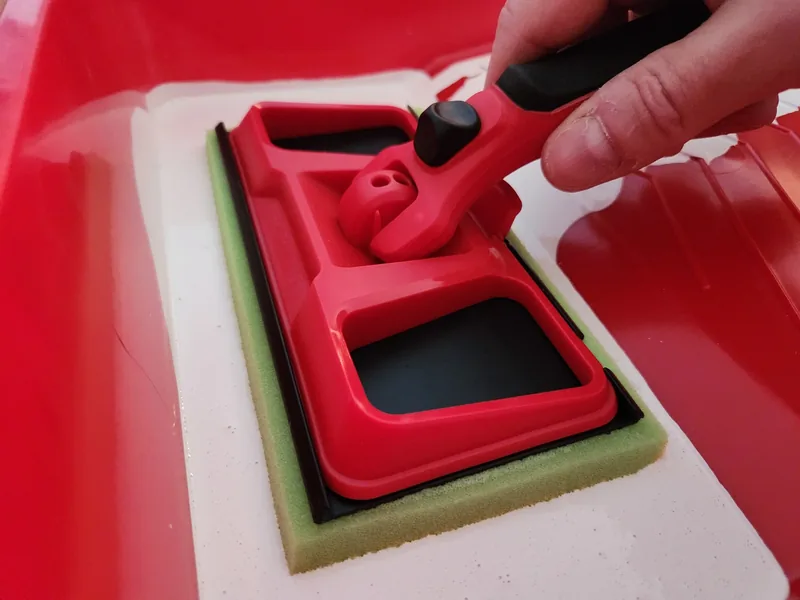
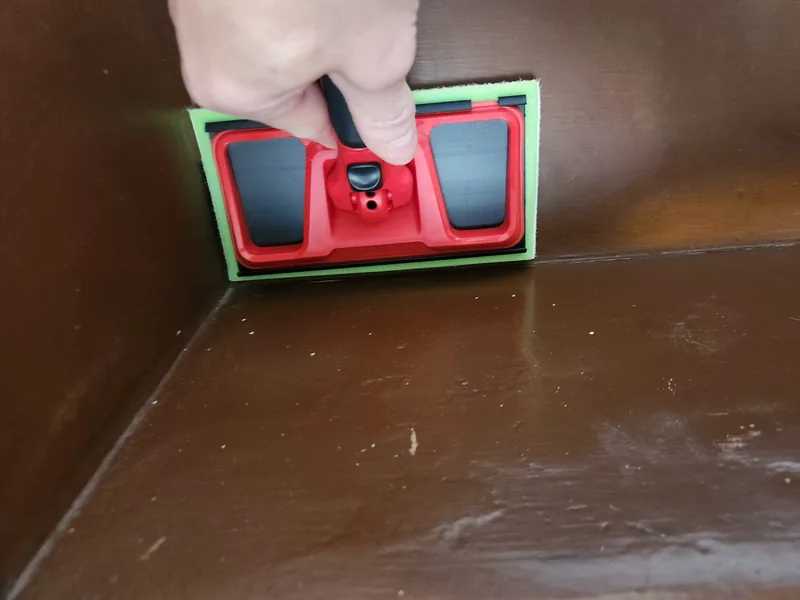
- Shur-Line Pad Painter (7-inch): This was the star of the show. The 7-inch size is ideal for stair risers, and its swivel pad holder locks securely at any angle. I also grabbed a refill pad, just in case.
- Painter's Caulk: To fill any small gaps or cracks that may have appeared over the years, ensuring a smooth finish.
- Painter's Tape: Even with the best tricks, it's wise to have some tape on hand for unexpected areas or touch-ups.
- Cutting Brushes: For those particularly tricky spots where the pad might not reach perfectly.
- Primer and Paint Tray: Essential for proper adhesion and color application. The final paint color was chosen to match our existing wall paint for a cohesive look.
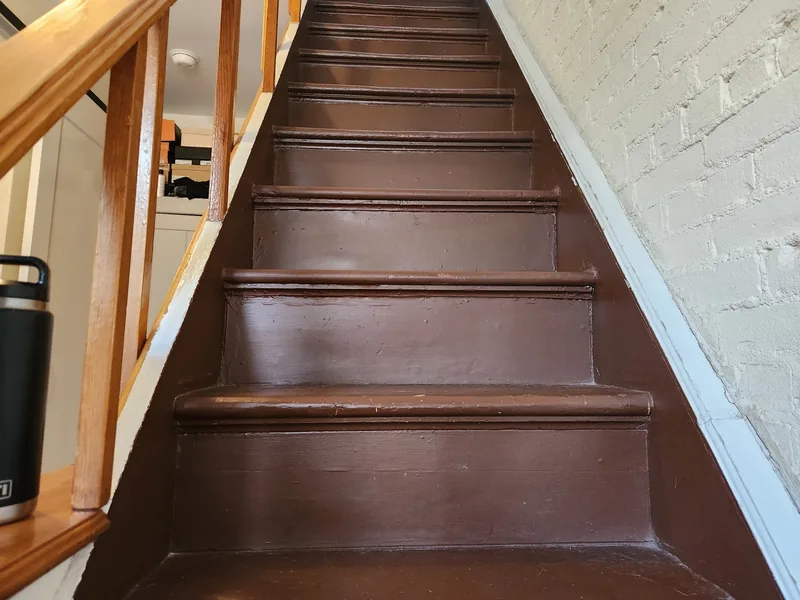
You can see the stairs before I started - clearly in need of some attention!

I also picked up some other essentials:
- DAP Alex Ultra Advanced Latex Sealant
- FrogTape Advanced Painters Tape
- Purdy Clearcut Glide Paint Brush
- Rust-Oleum Zinsser B-I-N Advanced Synthetic Shellac Primer
- Bates 9-Inch Paint Tray (3 Pack)
The Edging Pad Magic in Action
With all my supplies ready, it was time to get to work. I skipped taping off the treads entirely. Instead, I filled the paint tray with primer and grabbed the pad painter. The central black button is a lifesaver - it locks the pad at the precise angle you need, and you can easily adjust it with your thumb on the fly. Swapping out pads is simple too; just press the lock tab in the middle to slide the old one out and a new one in.
The key is to load the pad with a manageable amount of paint, ensuring it's not dripping. Excess paint can lead to drips and uneven coverage. Once loaded, press the pad gently against the stair riser and move it horizontally. The rectangular shape of the pad creates a straight, sharp line without any tedious taping or cutting work. It also lays down paint more smoothly than a brush, minimizing those tell-tale brush lines.
Because the pad is flat and designed for edging, you can get right up to the edge of the tread without any issues - something a roller can't achieve. For those really tight corners or intricate spots, sometimes it's easier to detach the pad from its holder. The pad itself is quite flexible, giving you more control for those fiddly bits. It takes a little practice to get the rhythm down, but once you do, you can fly through those risers.
This method is fantastic for anyone looking to cut down on prep and painting time for stairs. I've found that i used this wall edger, and it saved me a significant amount of time. It's not just for stairs, either. I've used a similar technique for painting the edges of bookshelves or even the baseboards in a room where I wanted a perfectly clean line against a different colored wall. The result? A professional-looking finish with a fraction of the effort.
The stairs are old, and the underlying structure isn't perfectly straight, but the risers turned out remarkably neat. And the best part? I used this wall edger, and it was all achieved without a single piece of painter's tape on the risers themselves. I estimate i used this wall edger and saved myself about an hour of work compared to my old method. It's a simple tool, but its impact on efficiency and the quality of the finish is undeniable.
The final product speaks for itself. The contrast between the treads and the newly painted risers gives the staircase a fresh, updated look. It's a testament to how the right tool can completely change your approach to a DIY project. For anyone facing a similar stair-painting task, I highly recommend giving this wall edging pad method a try. You might just find yourself rethinking how you tackle those tricky edges forever.