Did you know that despite its acclaimed user-friendliness, nearly half of Nintendo Switch owners report difficulty discovering or fully utilizing advanced console features? (Statista, 2023) It's easy to dive straight into a game, but unlocking the full potential of your Nintendo Switch, or the upcoming Switch 2, requires a deeper understanding of its often-hidden capabilities. These crucial hacks every Nintendo Switch owner should know will transform your gaming experience, making it more personalized, efficient, and enjoyable. By mastering these tips, you'll navigate settings with ease, optimize performance, and connect with fellow gamers like never before.
Optimize Your Display and Controls
While Nintendo is known for its vibrant and playful aesthetic, sometimes a sleeker look is preferred, especially during late-night gaming sessions. Both the original Nintendo Switch and the Switch 2 offer a dark mode, which can be a game-changer for your eyes and even extend battery life on OLED models.
Activate Dark Mode for Enhanced Viewing
To enable this feature, simply navigate to your System Settings (the gear icon on your taskbar). Scroll down to Themes and select Basic Dark. This instantly transforms your home screen and menu pages to a sophisticated black, providing a more comfortable viewing experience. Remember, this aesthetic change primarily affects the console's interface; your in-game visuals remain untouched.
Remap Buttons for Custom Comfort and Accessibility
Personalizing your controller layout can drastically improve gameplay, whether for ergonomic comfort, accessibility needs, or gaining a competitive edge. Both Switch models allow extensive button remapping, though the exact pathways differ slightly.
Button Remapping on the Original Nintendo Switch
On the classic Switch, access System Settings > Controllers and Sensors > Change Button Mapping. Here, you can select any connected controller--Joy-Cons, Pro Controllers, and some third-party options--and reassign buttons to your preference. Imagine remapping the 'jump' button to a shoulder trigger in Super Mario Bros. Wonder for more fluid platforming; these hacks every Nintendo Switch owner can implement offer unparalleled customization (Nintendo Support, 2024).
Button Remapping on the Nintendo Switch 2
The Switch 2 streamlines and expands these options. You'll find button remapping under System Settings > Accessibility > Button Mapping. This menu supports Joy-Con 2 controllers, Pro 2 controllers, and Joy-Con 2s in charging grips. A significant upgrade is the ability to toggle Button Mapping in Quick Settings. By holding the physical Home button, you can access an Edit Mapping option, allowing for on-the-fly adjustments.
Furthermore, the Switch 2 introduces additional controller customizations under System Settings > Controllers & Accessories. For Pro 2 Controller or Joy-Con 2 charging grip users, the GL/GR Button Settings allow you to assign functions to these extra buttons. You can also enable or disable Joy-Con 2 Mouse Controls and adjust their sensitivity. Finally, if you're accustomed to Xbox layouts, the option to Swap A and B buttons provides a welcome change, remapping just these two primary action buttons.
Enhanced Multiplayer and Game Sharing
Nintendo's commitment to social gaming shines through features that let you share experiences with friends, even if they don't own the game. These features leverage your console's capabilities to foster communal play.
GameShare: Local Multiplayer Made Easy
GameShare, a standout feature for the Nintendo Switch 2, extends local multiplayer possibilities to both Switch 2 and original Switch owners nearby. Similar to the nostalgic DS Download Play, GameShare streams games directly from a host system, allowing friends to join without owning their own copy.
While incredibly convenient, GameShare is title-specific. Accessing it varies by game; for instance, in Super Mario Odyssey, you'd select GameShare + Local Play when starting a two-player game. To join a session, navigate to the GameShare icon (a TV with a wireless signal) on your main menu and select your friend's session under Join GameShare. This feature even allows original Switch systems to play certain Switch 2 exclusive titles, like Donkey Kong Bananza, locally.
GameChat: Online Multiplayer with Integrated Sharing
GameChat takes game sharing online, exclusively for Nintendo Switch 2 systems. While also game-specific and requiring initial setup, it offers a more integrated online experience. Start a GameChat session by pressing the physical C button or selecting the C icon from the main menu. This enables voice chat, gameplay viewing, and even camera feeds with friends.
Once in a GameChat, open your game and initiate sharing through its in-game menu (e.g., in Super Mario Odyssey, you'll find the option when starting a two-player game). Friends in your chat can then jump directly into the game. Note that GameChat is free for Switch 2 owners until March 31, 2026, after which it will require a Nintendo Switch Online membership.
Efficient Data Management and Transfers
With modern AAA titles demanding significant storage, effective data management is paramount. These hacks every Nintendo Switch owner can use ensure you always have space for new adventures and can seamlessly move your progress between systems.
Archive Unused Games to Reclaim Storage Space
Both Switch consoles offer limited internal storage, quickly consumed by digital downloads. Fortunately, you can archive games, freeing up space while preserving your save data and keeping them in your library for easy redownload.
Archiving on the Original Nintendo Switch
On the original Switch, hover over a game, press the + button, and select Manage Software > Archive Software. You can also use Delete Software, but archiving keeps the icon on your home menu for easier re-downloading. For bulk management, go to System Settings > Data Management > Quick Archive, where you can see storage consumption and delete screenshots/videos. For more granular control, use Manage Software under Data Management.
Archiving on the Nintendo Switch 2
The Switch 2 simplifies this: the 'Delete' function now defaults to archiving, removing the separate 'Archive' option. You can uncheck Keep HOME Menu Icon if you prefer a cleaner menu. Crucially, neither archiving nor deleting affects your save data, which is typically small. To delete save data specifically, navigate to System Settings > Data Management > Delete Save Data.
To restore an archived game, simply redownload it. If you kept the icon, you can do so from your main menu; otherwise, visit the eShop page. Among the most crucial hacks every Nintendo Switch user needs is the ability to manage storage effectively without losing progress.
Seamlessly Transfer Games and Save Data Between Systems
Upgrading to a new console or managing multiple Switches? Transferring data is straightforward. The easiest method for upgrading is a full system transfer, available during Switch 2 setup on the "To Nintendo Switch Console Owners" screen. Ensure both consoles are nearby to transfer games and saves while retaining copies on your original device.
If a full system transfer isn't feasible, you can transfer data on a case-by-case basis. Physical games are simple: move the game card. For digital games, select the Virtual Game Cards icon from your main menu, choose a game, and select Load on Other System to transfer it between consoles linked to your account.
Save data transfers are handled under System Settings > Data Management > Transfer Your Save Data for local transfers. For online save data management, a Nintendo Switch Online membership is required, accessible via System Settings > Data Management > Save Data Cloud. If a game already has cloud saves, you can download them by hovering over the game's icon, pressing the + button, and selecting data under Save Data Cloud.
Utilize MicroSD Cards for Expanded Storage
To further alleviate storage concerns, both consoles support microSD cards. You can move games between internal storage and an inserted microSD card via System Settings > Data Management > Move Data Between System / microSD Card. On the Switch 2, this option is called Move System / microSD Express Card Data, reflecting its specialized card requirements. This is an essential hack for any owner of a Nintendo Switch.
Capturing and Sharing Your Moments
The ability to capture screenshots and video clips is standard on modern consoles, and the Switch is no exception. While direct social media sharing has become more complex, the Nintendo Switch App offers an excellent workaround.
Send Gameplay Screenshots to Your Smartphone
The Nintendo Switch App on your smartphone acts as a bridge for sharing your captured moments. This is especially useful for quickly posting to social media platforms.
Manual Uploads on the Original Nintendo Switch
On the original Switch, open your Album (the painting icon on the taskbar). Select a screenshot or video, press the physical A button to open the Sharing and Editing menu, and choose Send to Smartphone. You can send Only This One or select Send a Batch for multiple items.
Manual and Automatic Uploads on the Nintendo Switch 2
The Switch 2 offers both manual and automatic options. For manual uploads, go to Album, select an item, press the A button, and choose Upload to Smart Device. For batch uploads, select Quick Actions from the sidebar, then Upload to Smart Device. To streamline the process, enable Automatic Uploads under Upload Settings in the Album sidebar.
Once uploaded, open the Nintendo Switch App on your phone and tap the Album icon. You can then download these files to your device for sharing. Note that these uploads are stored on Nintendo's servers, not your phone, with a limit of 100 files for 30 days, with older items being replaced by new ones.
Personalizing Your Profile and Privacy
Beyond gameplay, your Switch allows for personal expression and control over your online presence, ensuring your gaming experience is exactly how you want it.
Create and Customize Your Own Mii Avatar
Miis are not a relic of the Wii era! You can still create and personalize these charming avatars on both Switch consoles. Navigate to System Settings > Mii > Create/Edit a Mii. The Switch 2 adds options to start from a preset or an amiibo, but both lead to the familiar Mii creation menu, now with expanded hair color choices.
While Miis don't appear on the main menu, they can be utilized in various games. For instance, in Super Smash Bros. Ultimate, you can fight as your Mii. Another great example is using your custom Mii as your character in Nintendo Switch Sports or as a party member in Miitopia, adding a personal touch to your adventures.
Manage Your Online Status and Play Activity
Sometimes, you want to game privately without your friends knowing your every move. Both Switch models offer robust privacy settings.
To hide your online status, from the main menu, select your profile icon in the top-left corner. Go to User Settings > Friend Settings (under Friend Functions). On the original Switch, select No One under Display online status to:. On the Switch 2, change Online-Status Display to No One.
To prevent friends from seeing your recently played games, back out from Friend Settings and navigate to Play Activity Settings (under your profile icon > User Settings > Profile Settings). Here, select No One for the first option, which controls play activity visibility.
Advanced Input and Controller Hacks
The Switch ecosystem continuously evolves, offering innovative ways to interact with your games, including mouse controls and practical solutions for misplaced controllers.
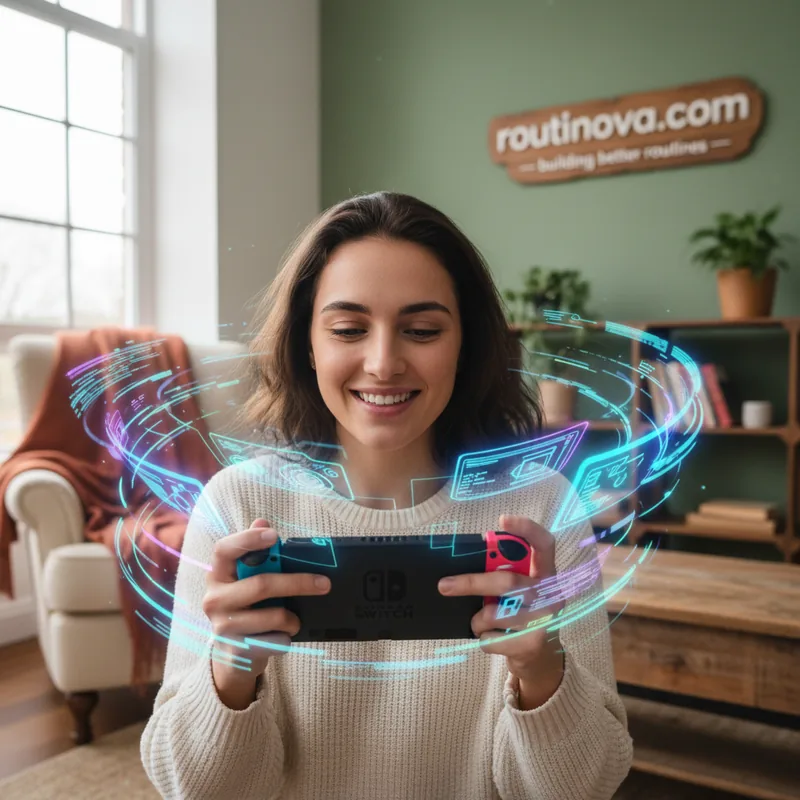
Maximize Mouse Mode on the Switch 2 (and USB-C Mice)
One of the most exciting additions to the Nintendo Switch 2 is integrated mouse controls. You can detach a Joy-Con 2 and use it on its side like a mouse, providing PC-like navigation on the main menu and unlocking new gameplay modes in compatible titles. Imagine the precision this offers in strategy games or first-person shooters like Cyberpunk 2077 (Nintendo Life, 2024).
Beyond Joy-Cons, the Switch 2 supports USB-C mice. If the Joy-Con 2 isn't comfortable, experiment with a standard USB-C mouse for potentially better ergonomics and precision. While not every game supports every mouse, it's worth exploring the options you have. For example, using a USB-C mouse could offer a significant advantage in a complex strategy game like Civilization VI if it gains Switch 2 mouse support, allowing for more precise unit and menu interactions. The original Switch also supports USB-C mice for a limited selection of games, though without the Joy-Con mouse functionality.
Locate Lost Controllers with the Ping Feature
Misplaced a Joy-Con, Joy-Con 2, or Pro Controller under a couch cushion? Your Switch can help you find it. From the main menu, select Controllers (the Joy-Con icon on the taskbar). Then, choose the second option: Find Controllers on the original Switch, or Search for Controllers on the Switch 2. Select a connected controller from the list, and it will vibrate, guiding you to its location.
By implementing these hacks every Nintendo Switch owner can gain a deeper, more personalized, and efficient gaming experience. From customizing your display and controls to managing your data and connecting with friends, these tips ensure you're getting the most out of your console.